 Living (and loving) Life
One of the most difficult things for a photographer to master is taking great photos under low-light conditions. Try as we might, sometimes a potentially awesome shot will turn out poorly because of under-exposure or blurring.
What we need to remember is that photography is as much science as it is art, and like any science the methods for creating success can be learned, practiced and mastered. With that mind, here are 8 tips for taking great low-light photographs:
Note: While some of the tips below apply primarily to actual stand-alone cameras, most of them apply equally as well to your phone’s camera.
1- When possible, use a tripod. Capturing a decent exposure in low light requires a relatively long exposure time, and long exposure times make it virtually impossible to avoid the dreaded “camera shake” that causes blurry images. Regardless of how steady your hand may be, you’ll likely find it difficult indeed to hold your camera perfectly still while capturing a lengthy exposure.
2 – If you find yourself in a situation where you don’t have a tripod with you, look for an object to use as a substitute. Your car hood, a fence post, a large rock, or pretty much any other large, stable object will work. Simply rest the camera on whatever you can find and snap away!
3 – Use the largest aperture (the smallest F/number) that your lens will allow. The larger the aperture, the more light that makes it into onto the sensor, and the more light that strikes the sensor the faster the shutter speed that you can use. And as you probably know, faster shutter speeds typically result in sharper images.
4 – If possible, avoid using any filters. Filters reduce the amount of light entering the camera, and as explained in the previous tip less light means a higher likelihood of taking a blurry photo.
5 – Increase your camera’s ISO setting. The higher the ISO, the more sensitive the sensor will be to light. The more sensitive the sensor is to light, the less light it takes to create a properly exposed image. Be careful here though because higher ISO settings tend to result in grainy photos.
I recommend experimenting with your camera until you know how it responds at various ISO numbers. As a general rule, less expensive compact cameras will be less tolerant of high ISO settings than more expensive ones, and even an entry-level DLSR will take better high ISO photos than the average compact.
6 – If your camera supports it, shoot in RAW mode. In RAW mode, the camera will record the image it receives through the lens pretty much as-is while shooting in JPEG mode results in images that have been optimized for smaller files sizes. In a nutshell, a RAW image file contains virtually all of the information and detail in a photo which allows for better manipulation of the exposure during post-processing (image editing).
7 – If you have to, use a flash. As a general rule, photos taken using a flash don’t turn out as good as those taken in natural light, but if the natural light is inadequate for ensuring a proper exposure you might find it better to take a decent photo with a flash than a poor photo without one. Also keep in mind that an external flash unit will do a better job for you than your camera’s built-in/pop-up flash.
8 – Upgrade to a newer, more expensive camera. Let’s face it, some cameras are going to perform poorly under low-light conditions no matter what you try. Today’s digital cameras are much better at performing at higher ISO’s than their predecessors, and they keep getting better all the time.
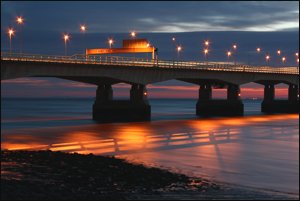
Credits: Photo courtesy of Peter Livingstone.