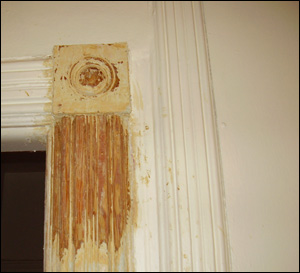
 Paint removal is not only a difficult process, it’s a messy one as well. That’s why so many homeowners opt out to have the work professionally done by a licensed and insured painting contractor.
Whether you hire someone else to strip your old paint or you do the work yourself, doing it right and using specific materials can help to cut down on the mess and create a smooth surface ready for paint, stain or primer. Use this guide to no-mess paint removal and you can be sure your paint is going to be removed without the big mess and hassle.
Prep Work
Before starting your paint removal project prep the area. Plenty of contractors plastic, tarps or drop cloths can help to keep your paint mess at bay.
Preparing the area from damage from paint removal chemicals is also in your best interests to prevent stains and damages from caustic paint thinner chemicals or abrasive removal techniques. Tape off any areas with painter grade tape and contractors plastic to prevent damages and problems before they start.
Heat Treatment
Some paint materials can be removed using a heat gun. This simple to use process use a machine that looks similar to a blow dryer but reaches much higher temperatures. A heat gun heats the paint to a pliable temperature for easy removal without heating the substrate too much to cause damages. Simply wave the heat gun over the old paint with one hand and using a paint scrapper with the other to gently scrape away paint from its surface.
Take paint peels as they come off and dispose of them immediately. Heat guns work great for most paints, but be wary of using heat guns on or around plastic, wood and other easily malleable materials that react to heat as they can quickly and permanently destroy sensitive materials.
Solvent-Backed Paint Removal
Solvent-backed paint remover panels are a great way to remove paint mess-free. These simple to use panels are backed with an adhesive that bonds to the surface of your paint removal project. Panels are stacked one on top of another to completely conform to the surface of the material.
These solvent-backed paint remover panels are smoothed flat and tight against the old paint using a putty knife. A chemical reaction immediately begins to take place and changes the paints chemical structure right away. Once the chemical reaction has occurred and the paint remover has been allowed to cure overnight, it can easily be scraped free from the substrate for a perfect paint and mess-free project.
Sanding
With a power sander, the right eye/respiratory safety equipment and a vacuum attachment, you can easily strip paint from wood, metal and other sandable objects without making a huge mess. Most orbital and belt sanders come with a bag attachment. With a simple coupling that attaches to a shop vacuum, you can cut down on the dust and debris that comes from removing paint. Sanding has its obvious limitations in that it can easily damage materials if they are too soft for the rough texture of sandpaper.
Sandblasting
In order to contain your paint mess use a sandblasting box. While it’s not going to do a very good job at keeping larger paint removal project messes at bay, it does work perfect for smaller items that need to be cleaned. Softer metals like aluminum and brass can easily be damaged by harsh chemicals and abrasive paint removers. Sandblasting helps remove paint from more delicate materials without damaging them in the process.
About the author: This article was contributed by Olger Fallas Painting, a paint removal contractor located in Maplewood, New Jersey.
Credits: Photo courtesy of Zach van Schouwen.